After about 500 hours of printing reliably, my Makerbot Replicator 2 finally barfed. I walked in to a 4 hour print completion that looked like this:
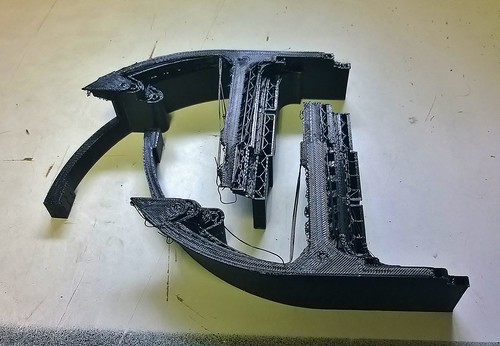
Woah. When you walk in on a print failure like this, it’s important to root-cause the problem, so that you can prevent it in future. Not only did I lose about 4 hours on this job, but also about $5 in PLA. I looked over the printer first to check for the usual problems – extruder head movement restricted, PLA feed issues. Nothing there, so I took a closer look at the piece. I noticed an interesting pattern:


Notice how the problem started at a certain layer – that is not really interesting; notice instead how the layers above the break point are basically intact, just shifted over to the left (along the X axis). A couple of possibilities:
- A problem with the SD card or the X3G file on the SD.
- Corrupted firmware (on how it controls the X axis)
- Problems on the X axis travel (bad lubrication, loose drive belt)
First I took a look at 1 and 2 – the software problems. I looked at those first because those are the simplest to fix. I reformatted the SD card, re-built the X3G file and reset the printer to factory defaults. Then I kicked off the same print job and noticed the problem in action (thankfully it was very easy to reproduce). Here is a video of the issue:
Hear the THUNK THUNK? That is the head either stopping without deceleration, or step skipping. This is what happens on the print:
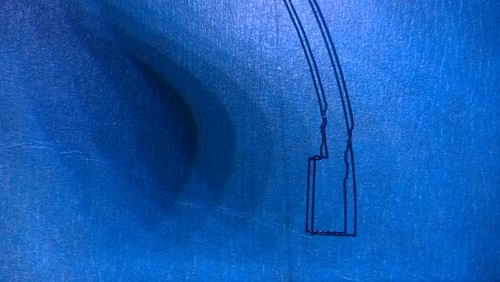
The squiggly line is where the steps are skipped. This means that you loose alignment between layers. You can see it more clearly in this larger photo:

So this makes the printer basically useless. Bummer. I started digging around and found a great YouTube video by forbinone that describes the same problem and gives a very simple fix. Basically, the problem is that the X-axis servo cable, from being too tightly crimped in the factory, and the thousands of forwards-backwards cycles, causes some of the cores inside the cable to break. That means skipped steps. The solution of course is to replace the cable.
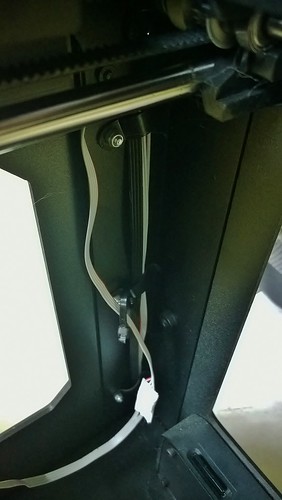
Once you remove the right-side MDF from the Replicator 2, you can see the problem in the X-axis stepper cable (light grey ribbon cable) – it is crimped far too tightly.
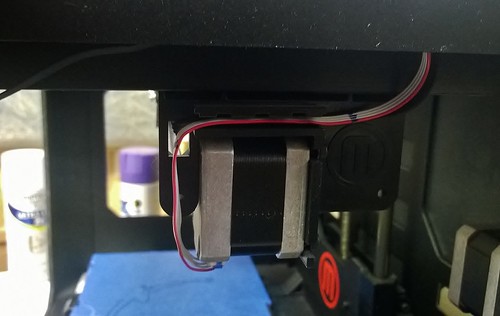
Mark the point where the kink in the cable forms (in the diagram above, the problem space is at the blue mark on the cable near the top-right of the picture), and then remove the little bar holding the cable in place to free the grey cable. Ensure the black ribbon remains in place (it is for the homing switch and does not suffer this problem), and replace the little bar.

Now you just trim away the problem section of cable, and splice in some new ribbon cable. To ensure the splicing did not lead to any shorts across the four wires, I decided to use some 0.1″ headers.
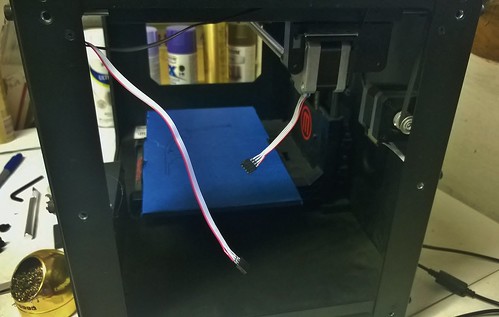
Then add in the new section. Be sure to add enough that there is no tension in the wire – there should be enough play to allow the X-axis gantry it to move smoothly forwards and backwards without getting tangled anywhere. It is critical to ensure you keep the polarity correct – that is, don’t accidentally flip the splice so that the leftmost cable on one end of the original ribbon is now connected to the rightmost cable of the ribbon. That could badly damage the printer.
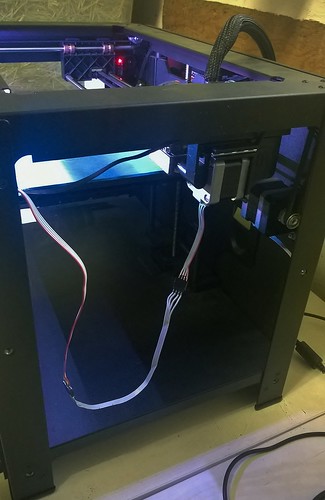
To ensure the new longer section did not get tangled into the rest of the machine, I cable tied it to the front-right vertical beam.
To finish up, I added some insulation to the joints, and bolted the MDF back to the machine.

It definitely looks a little war weary, but after the operation, it runs perfectly. I did the same 4 hour part again, and it came out without any issues:


